| Web Site of ToyTrains1 |
| Model Railroad Layouts |
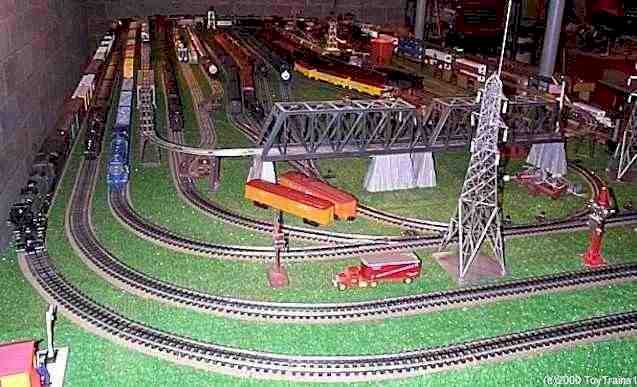
The layout is roughly 12' x 24', with four main loops
around the perimeter. The outside loop is O72, and branches off to a 5 track
locomotive ready yard.
The middle loop is O54, and the inner loop is O42. What's that you say? "That's only
three loops!" You're right! ![]() The fourth loop is inside of the other three, and is
an elevated O27 loop that currently hosts the MTH Subway cars (you can see part of the
elevated loop passing over a pair of Lionel bridges in the photo above, and in some of the other pictures on the site). The inner O42 loop branches off
to a 15 track yard that occupies the entire central area of the layout. It's along these
sidings that the operating accessories are located; they're also where I store long
passenger trains, ready to go. For the most part, the layout is constructed with Ross
Custom Switches and track, although some Lionel track is still in use. In the third photo
of the Yellowstone (the close up on the Yellowstone page), you can see one of the yard
tracks branching off from the main line. There are double crossovers between all of the
loops on the main level and the yard design incorporates not one, but two
reverse loops (one in each
direction). There are also two ramps between the main level and the elevated loop (one
going up and one going down, depending on which way the train is traveling). The
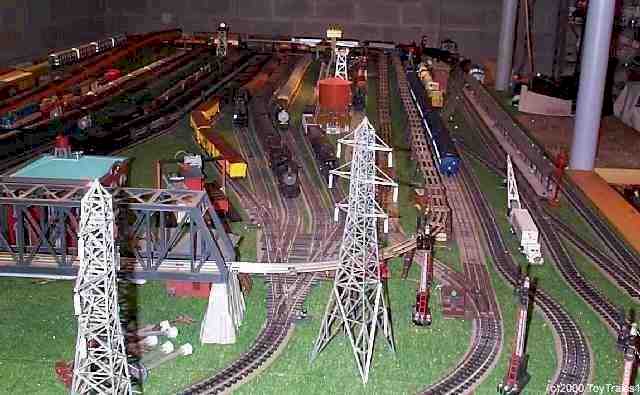
photo above shows the left side of the layout looking from the end where the yard turnouts
are located. In the photo below, taken from the "front" of the
layout, you can see the passenger terminal between loops 1 and 2, as well as a
number of the sidings in the yard. That's the Lionel postwar #456 coal
ramp (in dark gray) in the right background, as well as a number of other
postwar accessories. Part of the control panel is in the foreground.
The layout is powered by two ZW transformers for the main loops and the yard,
with a Z transformer for most of the accessories, and a 1033 transformer to
power some of the layout lighting.
The fourth loop is inside of the other three, and is
an elevated O27 loop that currently hosts the MTH Subway cars (you can see part of the
elevated loop passing over a pair of Lionel bridges in the photo above, and in some of the other pictures on the site). The inner O42 loop branches off
to a 15 track yard that occupies the entire central area of the layout. It's along these
sidings that the operating accessories are located; they're also where I store long
passenger trains, ready to go. For the most part, the layout is constructed with Ross
Custom Switches and track, although some Lionel track is still in use. In the third photo
of the Yellowstone (the close up on the Yellowstone page), you can see one of the yard
tracks branching off from the main line. There are double crossovers between all of the
loops on the main level and the yard design incorporates not one, but two
reverse loops (one in each
direction). There are also two ramps between the main level and the elevated loop (one
going up and one going down, depending on which way the train is traveling). The
photo above shows the left side of the layout looking from the end where the yard turnouts
are located. In the photo below, taken from the "front" of the
layout, you can see the passenger terminal between loops 1 and 2, as well as a
number of the sidings in the yard. That's the Lionel postwar #456 coal
ramp (in dark gray) in the right background, as well as a number of other
postwar accessories. Part of the control panel is in the foreground.
The layout is powered by two ZW transformers for the main loops and the yard,
with a Z transformer for most of the accessories, and a 1033 transformer to
power some of the layout lighting.

The photo below is a better shot of the
first one. You can clearly see the bridges carrying the elevated loop over
the main lines leading to the yard switches (that's a Ross 4-way yard switch
just under the bridge). As you can see, the yard is crammed with passenger
and freight consists; it's time to build more display cases!
![]()

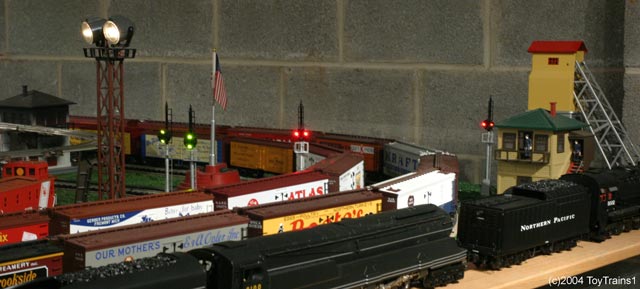
The photo below shows the right side of the layout, again looking from the end with the yard turnouts. You can see the yard structure quite clearly. The two innermost tracks in the yard are actually reverse loops In this shot you can also see, on the right, the crossovers between the three main outer loops. In the left middle of the picture, partly hiding behind the bridge, is the MTH operating firehouse and the Lionel culvert loader, both awaiting permanent installation.
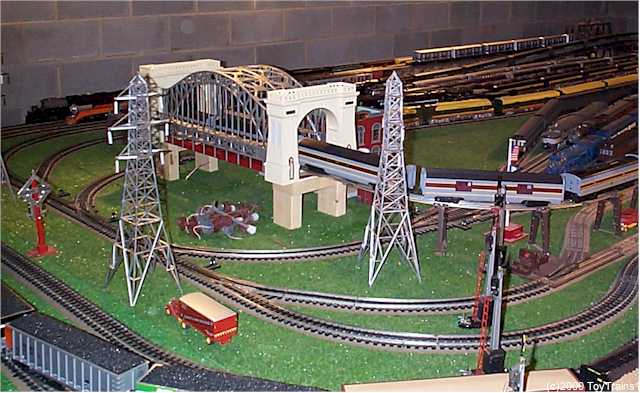
I couldn't resist a half-off sale at eToys,
and purchased a new Lionel Hellgate bridge. When it arrived, I was
impressed with the size -- so large, in fact, that I didn't quite know what to
do with it! ![]() I finally put in onto the layout in place of the two
plastic bridges over the mouth of the yard as shown above. I relocated one
of those bridges elsewhere on the elevated line. The other remains unused
until I can figure out where I can put it (i.e., where it can fit). As
shown below, the Hellgate is an awesome structure. I've temporarily
mounted it on some wood blocks -- I will build suitable permanent supports for
it, as it carries the elevated loop over the yard tracks. That's the
Lionel Phoebe Snow set on the bridge.
I finally put in onto the layout in place of the two
plastic bridges over the mouth of the yard as shown above. I relocated one
of those bridges elsewhere on the elevated line. The other remains unused
until I can figure out where I can put it (i.e., where it can fit). As
shown below, the Hellgate is an awesome structure. I've temporarily
mounted it on some wood blocks -- I will build suitable permanent supports for
it, as it carries the elevated loop over the yard tracks. That's the
Lionel Phoebe Snow set on the bridge.

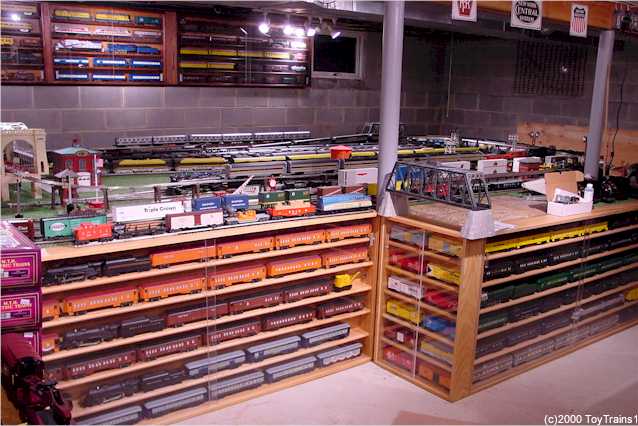
Following below are a few shots of the layout during Fall, 2000. The first is the view from the left hand side at the front of the layout, showing how I've pretty much walled off the front with display cases. The second is from the right hand side.

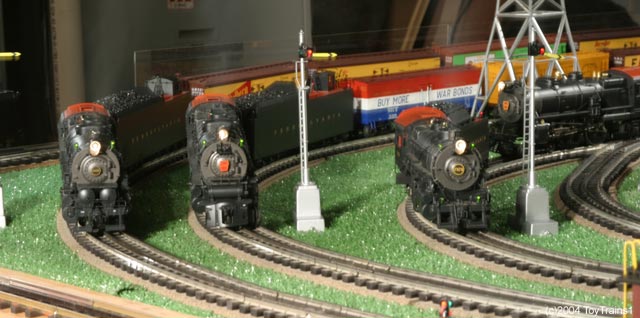
In early 2004, I made a few changes to the layout. Since I tend to run long trains, trackside accessories tend to stay in the activated position. With the postwar Lionel accessories that used solenoids to create the action, this is a prescription for trouble since a solenoid that is left on for too long will overheat and burn out. Many of those accessories were also way too large for O-scale, betraying their Standard Gauge origins. Fortunately, MTH has brought out a line of accessories that are not only scaled for O-gauge, they also don't use solenoids and have other neat features. I've spent some time installing a number of them and they are show below. First are the scale semaphores. They use a three position motor, going from red (blade down) to yellow (blade at 45 degrees), and then green (blade up).
This pair of scale crossing gates replaced the very oversized Lionel one that you can see in some of the photos above (it was almost as large as a small locomotive). These slowly lower with the lights flashing and then slowly raise after the train leaves the block. The action is quite realistic! The first photo shows the gates up ...

... and the second photo shows them down as a train goes past. That's the exceptional MTH Premier K4s #1737.

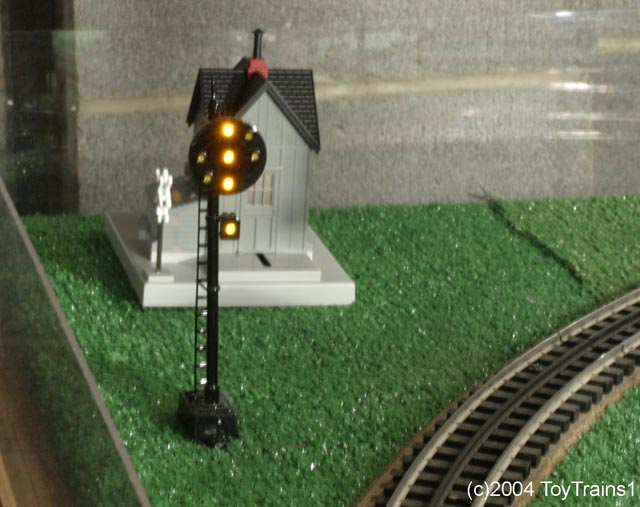
Next is the scale gateman. It uses a motor to open the door and position the gateman to greet the oncoming train. When the train departs, he turns around and goes back into the shack. Since these positions are just motor positions, it can stay in one position or another indefinitely without problems. The scale position signal goes from horizontal (stop) to 45 degrees (caution) to clear (vertical). In the first photo the block is clear ...
... while in the second photo there's a train in the block.

Next up is a modern 3 position color signal, also scale from MTH and also going from red to yellow to green. It's a little hard to get used to having red on the bottom vs. a standard auto traffic signal!

Finally, we have four scale color position signals that replaced Lionel postwar signals. These go from horizontal red to 45 degree yellow to vertical green and are, I believe, prototypical for the B&O.
In March of 2007 I shot a video showing the reverse loops in action on the layout. You can view it on the Multimedia page.
I have an "auxiliary" layout
upstairs, in the library next to my office. It's just two loops of tubular
track on the carpet, where I run my MTH Premier Shay and my MTH Premier
Climax,
but it's convenient when I want a quick break from the computer! As you
can see, the two little guys really put on quite a show!
![]() Note
the smoke ring from the Climax!
Note
the smoke ring from the Climax!


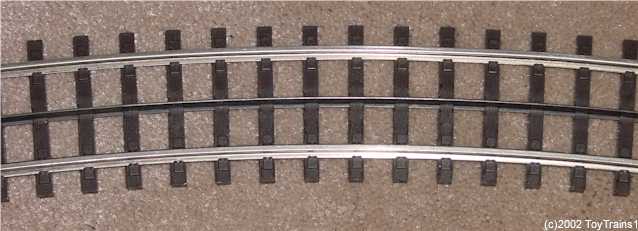
In early 2002, I added a third loop to the auxiliary layout to accommodate the MTH American Legacy set with tinplate passenger cars. The set included MTH Scale Trax, as shown below. While designed primarily for permanent layouts, it seems to be working well on the carpet of the auxiliary layout.
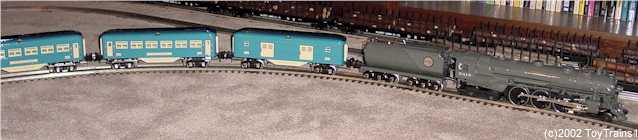
The club set included a gray enamel Hudson locomotive with tinplate tender (shown on the Hudson page), as well as four tinplate passenger cars, reproducing a set made by Lionel in 1939. Here are a few photos.
Let's fast-forward to 2010. The ScaleTrax has been problematic on the carpet -- it's much preferable to use it on a permanent layout. In the course of constructing "The Sky's The Limit Layout" in the same room, I had to disassemble a good chunk of the auxiliary layout. Rather than put together the ScaleTrax again, I replaced it with O-72 tubular track which is much more carpet friendly. I should mention that in the intervening years, I added a fourth loop of Standard Gauge track. As things are today, on the outside O-72 tubular track loop (standard O profile) is the American Legacy set with the #763E blue tinplate locomotive substituting for the tinplate scale Hudson shown above; together with the blue passenger cars they make up the "Baby Blue Comet". The next track in is O-54 tubular track (O-27 profile) and has the Hillcrest Lumber Climax logging locomotive with a very long string of log cars. The third loop is O-42 tubular track (O-27 profile) and has the C&O Shay (PS2, which replaced the PS1 WVP&P Shay shown above) logging locomotive with another string of log cars. The innermost loop is Standard Gauge and holds the #400E steam locomotive with seven 500-series freight cars. Here's what the auxiliary layout looks like now.

Videos of all four trains are available in True HD 1080p on the Multimedia page.
All of the text contained within this page and all of the photographs and videos taken by ToyTrains1 are copyright (c) 2000 - 2023 by ToyTrains1, and may not be reproduced, in whole or in part, without the written consent of ToyTrains1.
If you wish to use any of my content, please see my detailed copyright statement for terms and conditions of use.